How to Use Wireless Go
Are you ready to upgrade your audio game with the Rode Wireless Go microphone? This innovative wireless system allows content creators to capture high-quality audio without being tethered to their recording devices. Whether you’re a solo vlogger, filmmaker, or podcaster, the Wireless Go offers flexibility and professional-grade sound. In this comprehensive guide, you’ll learn how to set up, pair, and maximize the potential of your Wireless Go microphone.
Setting Up Your Wireless Go System
Before diving into the technical aspects, unbox your Wireless Go and explore its components. Ensure you have the transmitter, receiver, and necessary accessories. Review the user manual for a detailed understanding of the product’s features.
Connecting To Smartphone Or Computer
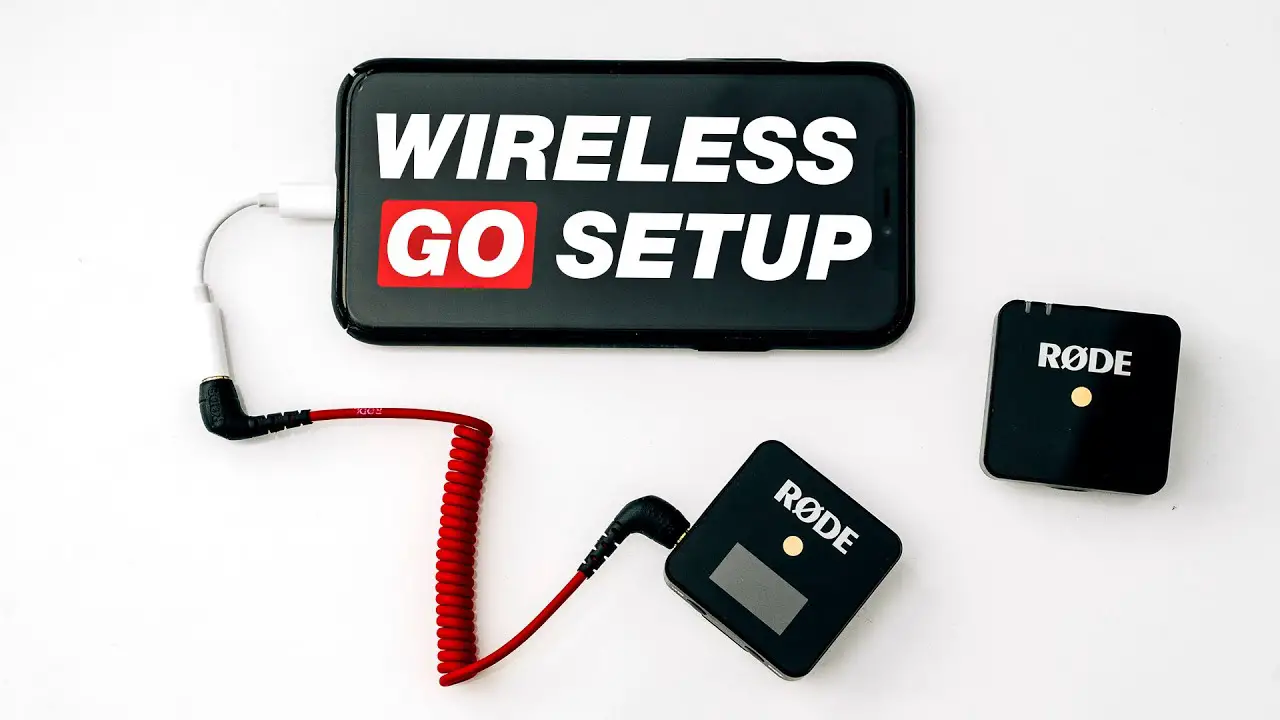
For content creators who frequently use smartphones for recording, the Wireless Go can be connected directly. Use a compatible TRS to TRRS adapter for seamless integration. Additionally, you can connect the Wireless Go to your computer using a compatible cable.
Pairing the Transmitter and Receiver
Power on both the transmitter and receiver by pressing and holding their respective power buttons. Following this, pair the two devices by referring to the product manual. Once paired, you’ll have a stable wireless connection for your recordings.
Adjusting the Audio Levels
Monitoring audio levels is crucial for capturing clear and distortion-free sound. Use the Wireless Go’s intuitive controls to adjust the gain levels based on your recording environment and requirements.
Test Your Setup
Before starting your official recording, conduct audio tests to ensure the microphone is functioning optimally. Speak into the microphone at varying distances to gauge its sensitivity and adjust settings accordingly.

Credit: m.youtube.com
Tips for Optimal Performance
Once your Wireless Go system is set up, consider employing these pro tips for maximizing its performance:
- Attach the provided windshields to minimize wind noise during outdoor recordings.
- Utilize the ‘Safety Channel’ feature to mitigate potential interference during critical recordings.
- Explore the uncompressed recording option for the highest possible audio quality.
- Regularly check and replace the batteries to avoid unexpected disruptions during recording sessions.
Credit: help.rode.com
Compact, Versatile, and Professional Audio
As the world’s smallest wireless microphone system, the Wireless Go by Rode empowers content creators to elevate their audio quality while maintaining mobility and flexibility. Whether you’re filming on the go or conducting an interview in a studio, the Wireless Go delivers impeccable sound with its cutting-edge technology and user-friendly design.
Frequently Asked Questions For How To Use Wireless Go
How Does Wireless Go Work?
Wireless Go works by transmitting audio signals wirelessly from the transmitter to the receiver. The transmitter captures the audio and sends it to the receiver, which then outputs the sound. The system is easy to set up and offers a convenient way to capture high-quality audio without being constrained by cables.
How Do I Connect My Wireless Microphone?
To connect your wireless microphone, follow these steps: 1. Turn on your wireless microphone by pressing and holding the power button on the receiver. 2. Pair your microphone to the receiver by pressing and holding the power button on the transmitter.
3. Confirm the connection and sound quality. 4. Adjust the microphone levels and check for peaking levels. 5. Connect the wireless microphone to your camera or device. Remember to refer to the user guide for specific instructions for your wireless microphone model.
How Do I Connect My Wireless Go 2?
To connect your Wireless Go II, press and hold the power button on the receiver to turn it on. Then, pair the transmitters to the receiver by holding the power buttons.
Can Rode Wireless Go Connect To Iphone?
Yes, the Rode Wireless GO can connect to an iPhone as it is MFi-certified, ensuring seamless interaction with all iOS devices.
